Adding a print/cut machine can expand your business
I just had the pleasure of doing two seminars on design in Atlantic City for the United States Sign Council. You need only walk through the door of the Exhibition Hall to realize the impact that the digital printer is having on the sign industry. It’s the biggest change since computer-cut vinyl lettering.
About the time the last issue of SignCraft was going to press, we took delivery on a Roland [Roland DGA, 800-542-2307, www.rolanddga.com] VersaCAMM® SP-300V, which is a digital print/cut machine. This meant some changes in what we would be doing here at Creativeink. My first concern was which software I would have to purchase for cutting. I was told that Roland’s VersaWorks™ software would handle both the printing and the vinyl cutting. Plus it could be done right through CorelDraw, which is the design software I use. “Yeah right!” as comedian Bill Cosby would say.
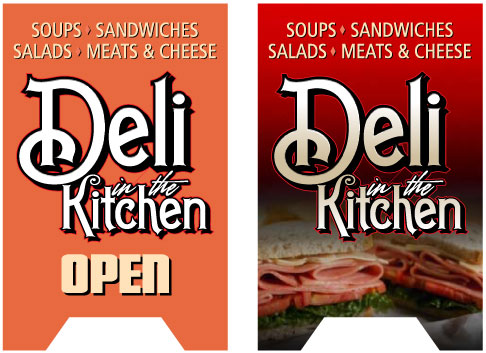
As these layouts show, adding a color image can add a lot of appeal to an otherwise simple A-frame sign.
My early experience with digital printers was that they could barely do the printing – much less do the cutting. Could this print-and-cut stuff really work? Making a print, laminating it and then re-loading it into the printer and cutting it? Yeah, right!
The digital printing workspace
It’s easy to underestimate the space you need for a digital printer. You need room around the unit to load media and a place for the finished prints to lay out flat. For a 30-in. printer, plan for a workspace of about 4-by-8-ft. to be able to work around it comfortably. For a 54-in. unit, make that more like a 6-by-11-ft. space. Handling those long rolls of media and wide prints requires more room.
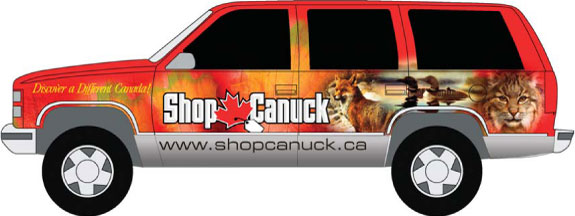
This is a design for a vehicle wrap that we're producing right now.
This area should be a clean, low-dust area. This isn’t something to put out in the shop next to the table saw. Ideally, it should be near your computer in a room where you can design, print, cut and laminate in an environment free of dust and overspray.
I set the machine up in our office with little effort and was ready to print. The machine prints pretty fast – a 2-by-8-ft. four-color image took about 30 minutes to print. That’s a lot faster than my printing experiences of five years ago.
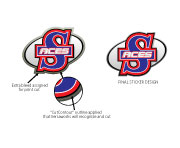
It was true that I needed no additional software for cutting. You need only to create a “Cut Contour” color in Illustrator or Corel, then assign that color to the contour you wish to cut. Add a bleed (extend the color slightly beyond the cut line) so that if there is any variation during the cutting you won’t show any white vinyl. Then you export as an EPS file and send it to the cutter. The VersaWorks software recognizes that color name as an outline that needs to be cut rather than printed.
I made a few prints, then it was off to Toronto to work the sign show. I was there to put the printer through its paces for my friends at Canadian Signcrafters Supply. Even with limited experience I was able to do some really nice prints that I had designed in CorelDraw. A fellow sign maker stopped by and showed me how to use the print/cut options. It was starting to be a little more fun to operate.


Imagining the possibilities
Once the technical side is out of the way, your mind takes off in all directions. You find yourself thinking, “I can do this…” and “I can do that…” “We can sell this…” and “We could sell that!” Whoa, boy—before you make plans to be the Donald Trump of the sign industry, there’s more to learn.
As a designer, I first thought of all the neat effects and tricks we could use on our signs, adding some bevels, blends, textures and more (and still keep it readable, of course). Then, what about the ability we now had to design and print little stickers and contour cut them? We could make them for hockey helmets, packages, signs, CD labels, vehicles, equipment and more. How about the ability to offer someone a full color banner that they can use for trade shows and advertising their business? The excitement raced through my head. Man, this was like Christmas!
Then reality set in. I started making some silly mistakes like forgetting to set a new base point and printing over a design I just did. Or forgetting to leave some blank vinyl around small decals. The rollers need room to grip the vinyl when it’s time to contour cut the decals. But there is a learning curve with everything, and soon the correct process becomes second nature.
Digital print/cut isn’t only about printing big color pictures on your signs. That can be a powerful tool when it’s appropriate, but you can do much more than that. You can print a customer’s logo, contour cut it, then use it on their sign with conventional vinyl lettering – that you cut on the same unit. You can print a custom color on the vinyl then cut the lettering out of it. No more buying a roll of lavender vinyl film to cut a few lines of copy to match a corporate color. That saves wasted inventory expense.
Laminate for maximum protection
Lamination is necessary on inkjet prints whenever there is a likelihood of abrasion on the print, as for vehicle work. It also extends the life of the print by minimizing fading. Unlaminated, a print might last three years outdoors, while proper lamination can easily extend that to five years.
You don’t have to laminate every job, though. We did our own “scratch tests” on Roland’s new Eco-Sol Max inks and they held up very well. Many routine sign jobs—like a real estate sign, banner or an A-frame sign – don’t need lamination.
I have talked with many sign people about lamination and each seems to be doing it a little differently. Some use film lamination, applying a layer of clear film over the print. You need a laminator for this, and they can cost anywhere from $2000 to the cost of the printer. Others spray or wipe on a clear liquid laminate product. Everyone seems to have his or her preferred method, usually developed by trial and error. The laminating scene reminds me of the first major snowfall here in Canada when everyone becomes a crazy driver trying to adjust to the new season. They’re all over the place—and some end up in the ditch!
Laminating can seem like a hassle, but just think of all the vinyl you have applied over the years and imagine doing it with a machine instead of a squeegee and you have it licked. The best advice I have received so far is to have adequate room in your workspace to handle large prints for laminating. It’s also a good idea to save your digital printing mistakes and use them while setting up and learning to use your laminator.
Rethinking your designs
After years of having to consider how much extra time adding a photo, a graphic or an effect to lettering would add to the production time, digital printing is a new approach. Now that only affects your design time—your production time isn’t affected much by such things. The layouts shown here show how you can put the power of digital printing to work for your customers to maximize the advertising value.
Of course you need to be sure your design and computer time is adequately charged for. There is a learning curve you have to work through, as well as other time that you spend getting things to work just right, and you have to be compensated for that. If you’re working at your design skills, you’re creating a product with more advertising potential, and you should be able to charge accordingly.
For me, the advantage of digital printing is how it can expand your business. You can do more design-wise: four-color images, blends, fills and bevels on text, and so much more. You can do more production-wise, too: printing everything from signs and vehicle wraps to banners and small decals. It’s a new approach to sign making.
